

Renovating a kitchen step by step: what happens first and which trade comes in at each stage
Measure, order, demolish, install, tile and fit: the order of a kitchen renovation, which trade enters at each stage and what is checked before moving on.
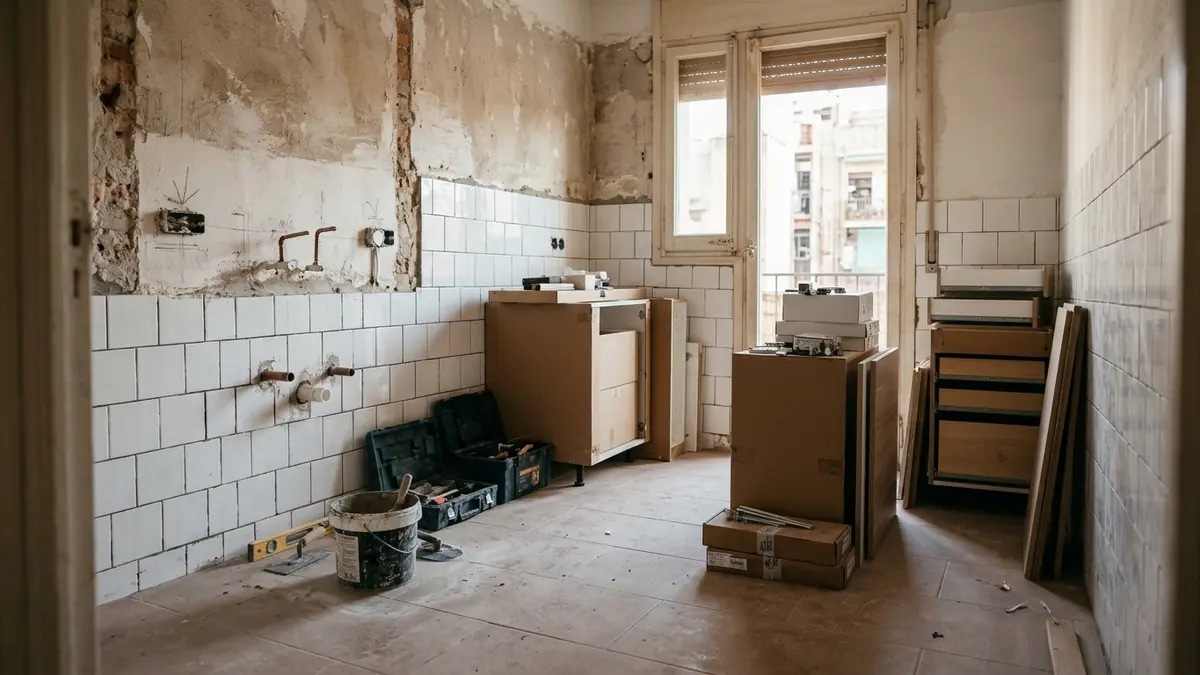
What are the steps to renovate a kitchen and in what order do the trades come in?
A kitchen renovation almost always follows this order: measuring and design, ordering the units, demolition, installations, tiling and flooring, fitting the units, worktop, appliances and finishing touches. Each trade enters when the previous one has left the base ready, and skipping a step is paid for with rework.
Key points
- The order is: measure and design, order units, demolish, installations, tiling and flooring, units, worktop, appliances and finishing touches.
- Units are ordered before the demolition, but with confirmed measurements and some margin to adjust whatever the works uncover.
- The worktop is measured with the units already fitted and levelled, never from a drawing or with the work half done.
- Installations are checked open and tested before tiling; once closed, fixing them costs far more.
- Plan for a few weeks without a working kitchen and set up a temporary corner in another room.
What comes first in a kitchen renovation: measure, design and order before breaking anything
The first step is not demolition, it is measuring. With the kitchen still in place, the real dimensions are taken, the positions of the soil stack, water supply, smoke outlet and consumer unit are noted, and the layout is decided.
Almost nobody measures the kitchen before anything is moved, and many people ask us to order the units once work has already started. At the technical visit we usually stop that: with the walls unopened, some measurements cannot yet be taken as reliable. A partition that looks straight but leans, a corner that is not 90 degrees or a pipe that eats up three centimetres can change a unit.
That said, waiting until the work is finished to order does not work either. Made-to-measure or factory units take weeks to arrive, and if you order late, the work stops with the tiling done and nothing to fit. The sensible solution is to order before opening up, but with the design settled on verified measurements and with adjustments planned: plinths, fillers and trim strips that absorb small differences.
This stage also fixes the layout (which one fits your space we explain separately: L-shaped, U-shaped, linear or parallel kitchen) and the measurements of a comfortable kitchen, such as worktop height, depth and walkway. If doubts are still open when demolition starts, every later change becomes a rework for the bricklayer or plumber.
The result of this stage is a dimensioned plan with the position of every water point, drain, socket and smoke outlet, plus the unit order placed. Without that, nobody should pick up the sledgehammer.
Demolition and installations: what stays hidden and is checked before closing up
The demolition and clearance team comes in first: old units, tiling, the floor if it is being replaced and, where relevant, the partition to be knocked down are removed. This is the stage where surprises appear, and it pays to leave some margin in the schedule for them.
In older buildings in the Eixample and Gràcia there is almost always a "brick" partition hiding a soil stack belonging to the owners' community; until the wall is opened, the real extent is unknown. That is why demolition and the decision on where the pipes will run cannot be settled from a drawing.
With the kitchen empty, the installation trades arrive: plumbing and drainage, electrics and, if there is gas, the authorised installer. What is renewed in each case is covered in the article on which installations need renewing in a kitchen; here what matters is the order and the checks.
Before anyone covers anything, the following is checked:
- Water supplies and drains are where the plan says, with the correct falls.
- The pipes have passed a pressure test and do not drip.
- The kitchen drain reaches the stack respecting the distances and the individual trap required by CTE DB-HS 5 (Technical Building Code); the sink has its own trap, up to 4.00 m from the stack.
- The smoke extraction has its outlet and the hood does not depend on an impossible run.
- The electrical lines, points and protections in the consumer unit follow the REBT (low-voltage regulations), and the new installation comes with the corresponding certificate.
This check saves more than anything else in the whole job. A leak behind new tiling means breaking out and replacing ceramic that may no longer be made the same. An hour of checking with the wall open costs little; the same check with the wall closed costs a demolition.
And yes: the site manager should be present at this point, because it is the only moment in the process when decisions can be corrected almost for free.
Tiling and flooring: why they go before the units
Tiling and flooring are done before a single unit is fitted, because the ceramic has to reach the real wall and not the back of a unit. A half-tiled wall, with tiles cut against the units, looks poor and complicates any future repair.
Before tiling, the walls are prepared: the chases for the installations are filled, rendered and smoothed. A wavy wall is not fixed with ceramic, it only becomes more visible. Then the tiler comes in and sets out the joints from the centre of the wall so that the cuts fall at the ends and not in the middle of a visible area.
The floor, usually porcelain stoneware, goes down before or after depending on the case, but always before the base units. Fitting the units on a finished, levelled floor is cleaner, and it also leaves the floor continuous underneath, which makes it easier to replace a unit in future without breaking anything.
One nuance worth knowing: when the tiling reaches the ceiling behind tall columns or cupboards that will take up the whole wall, you can save on ceramic where it will never be seen. This is decided with the design in hand, not during the works.
After tiling, the joints are grouted, left to dry for the time the adhesive manufacturer indicates, and the ceiling and untiled walls are painted. Painting before fitting the units avoids scuffs and marks on the new fronts.
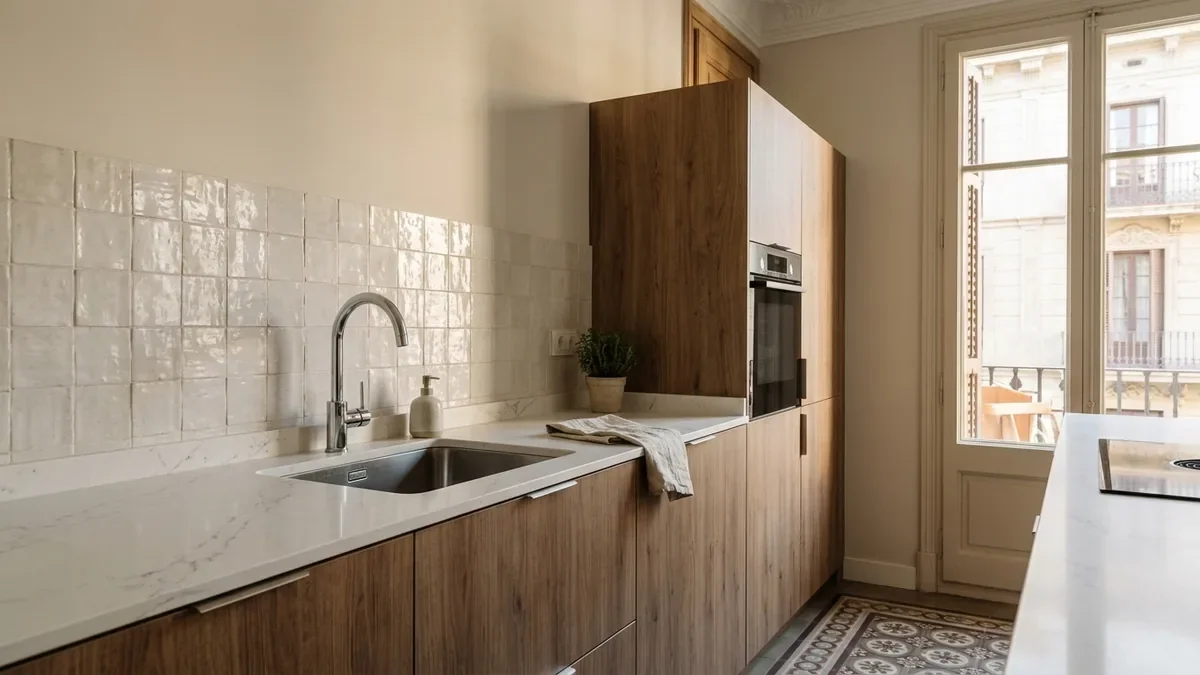
Fitting units and worktop: when the worktop is really measured
The units are fitted once the ceramic is finished and the installations have been tested. First the wall units, which are hung with nothing in the way on the floor, and then the base units, which are levelled with adjustable legs and fixed to each other and to the wall.
The worktop is the piece that is most often measured wrongly. It is measured when the base units are already fitted, levelled and fixed, not before. If the measurement is taken from a drawing or with the units still loose, a couple of millimetres of deviation between one unit and the next, or a wall that is not straight, end in a piece that does not fit.
With the final units in place, the manufacturer or installer sets out on site, marks the openings for the sink and the hob, and checks the wall line. The worktop is cut to that measurement, so how well it sits depends on this moment. It adds a few days between fitting and installation, and it shows in the schedule, but it avoids the error that really is expensive: a piece cut by eye that has to be redone.
This is one of the two things that usually upset the order. The other is the one we saw above: ordering units without checked measurements. Between them they explain a good part of the stoppages in a kitchen job.
Once the worktop is in place, the plumber returns to connect sink, taps and drains, and the electrician to finish the switches and sockets and the hob. This is what is called the trades' "second trip": they come in twice, once before and once after the units.
And meanwhile, the home carries on. You can live at home during the works if the walkway is well protected, but there will be a few weeks without a working kitchen, and the dust from demolition and tile cutting reaches every room. A temporary corner with a microwave, a kettle and a fridge in the living room helps more than it seems.
Appliances, finishing touches and final check
Appliances go in at the end, when the kitchen is free of coarse dust and the surfaces are protected. The oven, hob, hood, dishwasher and integrated fridge are installed, connected and tested one by one.
This is where the details that do not show on a plan are resolved: the alignment of the unit doors, the handles, the skirting and finishing plinths, the sanitary silicone around the sink and between the worktop and the tiling, and the covers of the electrical points. It is slow, unspectacular work, but it is what distinguishes a well-finished kitchen.
The final check is done with the kitchen actually working, not just by looking. All the taps are opened and the area under the sink is checked for leaks, the hob is switched on, the hood and extraction are tried, the dishwasher and oven are started, all doors and drawers are opened and closed and the result is compared with the plan.
Then comes the final site clean and removal of protections. Any outstanding detail is noted at the time, with a photo, and closed before the job is considered finished.
Who comes in at each stage and what happens if the order changes
In a kitchen renovation, the people involved are, in order, the site manager and the designer, the demolition team, the plumber, the electrician and the gas installer if there is gas, the bricklayer and the tiler, the kitchen fitter, the worktop installer and, at the end, whoever connects the appliances. With a single contract, the site manager coordinates all these handovers.
| Stage | Main trade | What is checked before moving to the next |
|---|---|---|
| Measuring and design | Site manager and designer | Dimensioned plan and units ordered with verified measurements |
| Demolition | Demolition team | What is behind walls and floor; plan adjusted |
| Installations | Plumber, electrician, gas fitter | Pressure test, drains, electrical protections, smoke outlet |
| Building work, tiling and flooring | Bricklayer and tiler | Flat walls, joints set out, levelled floor |
| Units | Fitter | Levelling, fixings and alignment of fronts |
| Worktop | Worktop installer | Measurement on units already fitted |
| Connections and appliances | Plumber, electrician, fitter | Everything running, no leaks or odd noises |
| Finishing touches and cleaning | Site manager | Snag list closed |
Changing the order usually proves expensive for a simple reason: each stage covers the previous one. Tiling before checking the installations means breaking ceramic if there is a leak. Fitting units before the floor condemns you to a partial floor. Measuring the worktop with the work half done leads to repeated pieces.
The total timescale depends on the scope, the delivery time of the units and what turns up when things are opened, so it is best not to trust a single figure. The sensible approach is to ask for a schedule by stages in the fixed quote, with the times for each trade and for supply, and to review it at the free technical visit. Which part of the total corresponds to each stage is detailed in the article on kitchen renovation quote.
And if at any point a trade offers to get ahead to save time, the useful question is what will be covered up by their work. If the answer is "an untested installation", it is best to wait a day.
Frequently asked questions about the order of a kitchen renovation
Do you tile before or after fitting kitchen units?
Before. Tiling and flooring are finished before any unit is fitted, so that the ceramic reaches the real wall and the units sit on a levelled base. Tiling afterwards means cutting against the units and complicates any later repair.
When is the kitchen worktop measured?
When the base units are already fitted, levelled and fixed. Measuring earlier, from a drawing or with loose units, risks millimetre mismatches that end in a piece that does not fit and has to be redone.
When do you order kitchen units?
Before demolition starts, but with the design settled on verified measurements, because they take weeks to arrive. It is wise to allow for small adjustments with fillers and plinths, since opening walls can reveal differences the plan did not show.
Can you live at home during a kitchen renovation?
Yes, with the work well protected and organised, but there will be a few weeks without a working kitchen and with dust throughout the home. A temporary corner with a fridge, microwave and kettle in another room covers day-to-day needs.
What is checked before closing the kitchen walls?
The position of supplies and drains, the pressure test of the pipes, the smoke outlet and the electrical lines with their protections. With the wall open any correction is cheap; after tiling it means breaking out and replacing.
Further reading
- L-shaped, U-shaped, linear or parallel kitchen: which to choose for your space - Before measuring and designing, it helps to know which layout fits your space.
- Which installations to renew when renovating a kitchen: electrics, gas and plumbing - What is renewed in the installations stage, in the detail that is only named here.
- Kitchen renovation quote: items, materials and how to avoid overspending - How much each stage weighs in the quote and how to avoid going over.
- Cost of renovating an 8 m² kitchen: the quote and the mainland boundary - A price reference for a typical-sized kitchen, with the mainland boundary.
- Kitchen renovations in Barcelona - How the kitchen renovation is organised with a single site manager and all the trades.
Sources
Keep reading
L-shaped, U-shaped, single-wall or galley kitchen: which to choose for your space
The width of the room rules out layouts before taste does. Here is which one fits your kitchen and what work moving it to another wall involves.
KitchensKitchen renovation budget: items, materials and how to stay on track
What a kitchen renovation costs in Spain in 2026, the main budget items, worktop and cabinet material choices, and practical ways to keep costs under control.
KitchensKitchen worktops: Silestone, Dekton, granite or porcelain
Thinking of changing your worktop? We compare Silestone XM, Dekton, granite and porcelain: pros, cons, prices and what to expect in everyday use.