

How a bathroom is renovated step by step: the order of the works
Protection, demolition, drains, electrics, waterproofing, tiling and fittings: the order of the trades and what is tested before anything is covered up.
What are the steps to renovate a bathroom, and in what order do the trades come in?
A bathroom is renovated in this order: the area is protected and demolished, then come the drains and plumbing, the electrics, the waterproofing, the tiling, the sanitaryware with the shower screen and, at the end, the finishing touches. Between one stage and the next, the previous work is checked before it is covered up.
The sequence looks obvious on paper. What decides whether the job goes well is what is checked between stages, because almost everything that fails in a bathroom ends up buried under the tiling.
Key points
- The order of a bathroom renovation is: protection and marking out, demolition, drains and plumbing, electrics, waterproofing, tiling and flooring, sanitaryware, shower screen and finishing touches.
- Each installation is tested before it is closed: plumbing under pressure, drains with water and waterproofing with a watertightness test.
- Once the bathroom is demolished, decisions are made on the soil stack, the old drains and the falls; that is why the first week outweighs the rest.
- An interior renovation that does not touch the structure or the façade can usually be handled with a prior works notification at the town hall.
Before touching anything: protection, paperwork and marking out
The work on a bathroom starts before the first sledgehammer blow, with the area prepared and the paperwork sorted. A bathroom renovated without that preparation ends up with a dirty landing, annoyed neighbours and decisions made with dust in your face.
First the route is protected: the hallway floor, door frames, and the lift and stairs if the building shares them. The water to the bathroom and the electricity for the area are cut off, and a temporary water point is left for the rest of the flat. If the bathroom is the only one in the home, it is worth talking from the start about how you will live during those days, because that is part of the plan too.
As for the paperwork, an interior renovation that does not touch the structure or the façade can usually be handled with a prior works notification. Each town hall has its own bylaw, so a prior enquiry to the town hall itself is the official way to find out what applies in your case. If you change the number of bathrooms in the home, it is worth having a professional assess whether it affects the habitability certificate (cédula de habitabilidad).
Then comes the marking out, which means drawing on the floor and wall what you are going to have: where the toilet goes, the centre line of the shower, the height of the taps, the width of the screen. It is the moment to settle layout decisions, and the ones not settled here are paid for later with redone work. If the bathroom is small, it is worth first looking at the decisions that gain space in a small bathroom.
Demolition and preparing the base
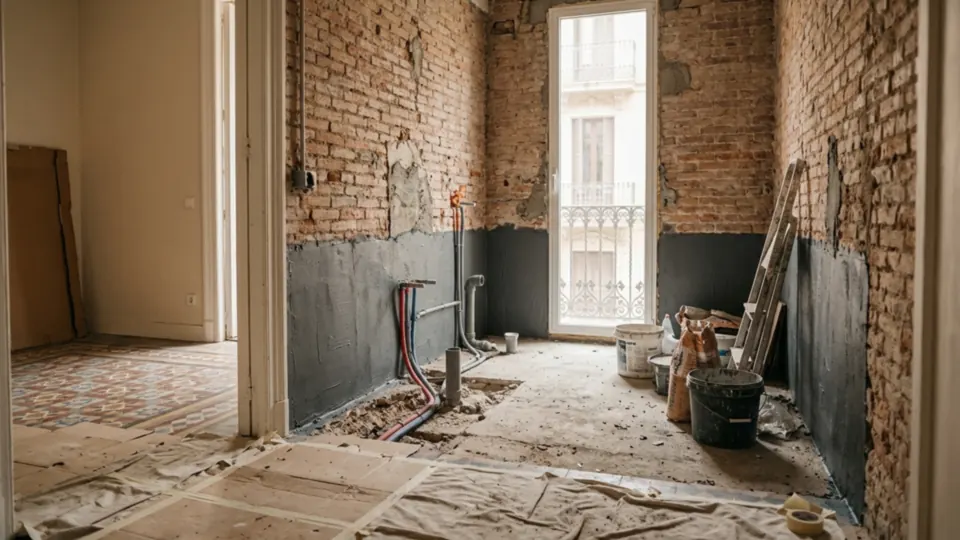
Demolition does not end when the last tile falls: it ends when we know what is underneath. The tiling, flooring, sanitaryware and, if needed, the false ceiling are removed, and the rubble is taken out along a protected route.
In older buildings in the Eixample and Gràcia there is almost always a communal soil stack or a lead drain hidden behind the tiling; until the demolition is done, the real scope is unknown. That is why the first week outweighs everything else: what appears here can change the position of the toilet, the route of the drains or the prior work with the owners' community.
With the bathroom stripped back, three checks are made before continuing:
- Condition of the floor slab and base: no old damp, cracks or soft areas under the flooring.
- Condition of the existing pipes and drains: what is kept and what is replaced entirely.
- Real position of the soil stack, which does not always match the plan.
This is also where it is decided which partition walls are rebuilt. A bathroom partition that turns out damp or out of plumb is not tiled over: it is rebuilt, brought to plumb and left ready to receive the material. Tiling over a doubtful base is the most expensive way to save a day.
Drains, plumbing and electrics: what goes inside the wall and floor
The installations go in before any finish, and their order matters too: first the drains, which depend on the fall, and then the water and electrics. The drains take priority because they cannot be bent; a water pipe can.
This is where the CTE DB-HS (Technical Building Code, health section) comes in. Its drainage section (DB-HS 5) sets that the toilet discharges directly into the soil stack or through a connecting branch of 1.00 m at most, that the siphon box is at most 2.00 m from the stack, and that washbasins, sinks and bidets have an individual trap up to 4.00 m from the stack. These are the values in the standard; the technician confirms them on the plan of your bathroom.
This leads to the question of what happens to the soil stack when you move the toilet. If you move it away from its original spot, the horizontal run gets longer and the fall becomes harder; with the floor open you can see whether there is room, and if there is not, the honest answer is that it does not move. That conversation happens at the technical visit, not with the bathroom half done.
With the drains in place, the plumbing is done: hot and cold water runs, isolation valves and, if it is being changed, the pre-installation for the water heater. Before anything is closed, the network is tested under pressure and checked to hold without leaks. The drains are tested by pouring water and checking that it runs without blockages or leaks at the joints. A drip at a joint is a five-minute job with the wall open and several weeks with the wall tiled.
The bathroom's electrical installation is done at the same time, with the chases still open. The lighting circuits, the extractor if the bathroom has no window, the mirror points and the sockets are fitted, respecting the protection zones around the shower set by the REBT (low-voltage regulations). If the renovation replaces the installation, the consumer unit is updated and the certificates for the new work are issued.
On the subject of extraction: a bathroom without a window needs mechanical ducted ventilation under CTE DB-HS 3, and the Decret 141/2012 on habitability requires ventilation to the outside in the bathroom of existing homes. The duct is decided now, not when the ceiling is already closed.
Waterproofing and falls: the stage you cannot see and cannot get wrong
Waterproofing goes after the installations are closed and before the tiling, and it is the stage most worth supervising because nobody will ever see it again. The materials, the regulations and the usual failures have their own article, so here we only cover where it fits and what is checked.
Before applying anything, the floor falls are rebuilt in mortar so that water runs towards the drain or linear channel and does not stay in the corners. They are checked by hand and with a long straightedge, and the real test is to pour a bucket of water and see where it goes. If it pools, it is corrected then: afterwards it can no longer be done.
Then the waterproofing system is applied to the floor and taken up the walls of the shower area and around the perimeter, with reinforcement at the joints, corners and pipe penetrations. The weak points of a bathroom are almost never in the middle of the floor, but there: the corner, the drain, the foot of the wall.
Once the waterproofing has cured, a watertightness test is carried out: the drain is plugged, the area is filled with water and left for the time set by the system manufacturer, checking whether the level drops or damp appears on the ceiling of the neighbour below. It is a cheap check, one of those that avoid the most redone work, and in a flat with neighbours below it is almost a matter of good neighbourliness.
A decision taken beforehand also matters here: whether the shower is a built-in (tiled) shower or has a shower tray, because it changes the floor height, the drain and the drying times. You have the comparison between a built-in shower and a tray to decide calmly.
Tiling and flooring: from setting out to grouting
Tiling starts with setting out the pieces, not with sticking on the first one. Reference lines are marked, the width of the wall is divided so that no thin cuts are left in a corner, and it is decided where the joints coincide with the fixed points: the mirror, the window, the screen.
The usual order is floor first or walls first depending on the system and the material; what matters is that it is always done with the same level criteria and that the lines are plumb and square. With large-format porcelain stoneware, the base also has to be much flatter than with a small tile, because any unevenness shows in the joint.
Profiles are fitted at corners and edges, expansion joints are respected and the cut-outs for taps, niche and access panels are left before sticking. The access to the isolation valves and the traps is not covered: it is left accessible, because sooner or later someone will need to get at it.
Between tiling and grouting there is a setting time that is respected, because stepping on or wetting a fresh tile disturbs the work. Then it is grouted, cleaned and sealed with silicone at the movement joints (floor-wall, corners, perimeter of the tray), never with rigid grout.
Each wet stage has its drying time, which is why the bathroom is not used while the work lasts. Total timescales depend on size, material and what appears during demolition, and you have them in the guide to bathroom prices and timescales.
Sanitaryware, shower screen and finishing touches: the end of the job
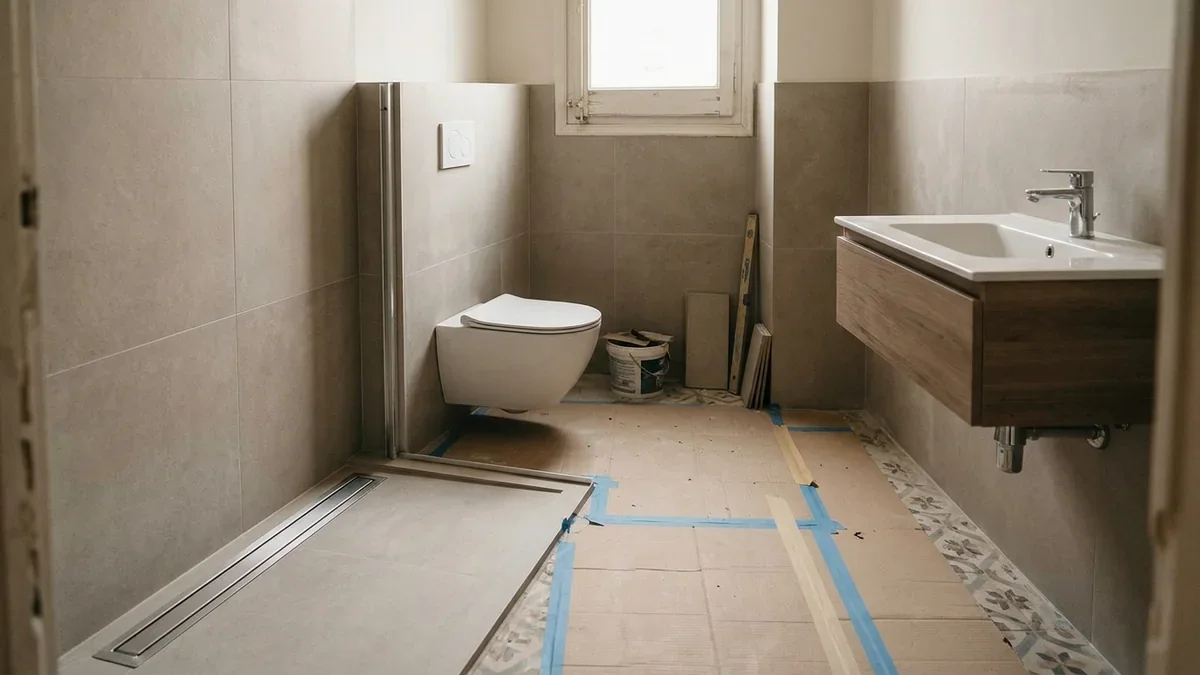
The sanitaryware and the screen go last because they are the most delicate and the easiest to damage. With the flooring and tiling finished, the toilet, the washbasin or vanity unit, the taps and the shower column or shower tap are fitted and connected to what was left prepared.
If the toilet is wall-hung, the frame was already fitted before the tiling and now only the ceramic and the flush plate are mounted. It is one of the reasons the initial marking out matters so much: the frame stays inside the wall and cannot be moved afterwards.
The screen is installed when the tiling and sealing have dried, and not before. The real measurement is taken on site, never the one from the plan, because walls are not perfectly straight and a centimetre of error in a piece of toughened glass cannot be fixed with silicone. That is why it is ordered with the bathroom already tiled.
The finishing touches include the mirror, accessories, extractor, light points and skirting boards if there are any. Before the bathroom is considered finished, a last round of tests is done with everything fitted: taps, drains at full flow, flushes, extraction and electrical circuits. If something fails, it is corrected with the site manager present and not the following week.
This table lists what is checked at each step before moving on to the next:
| Stage | What is checked | Why it cannot wait |
|---|---|---|
| Demolition | Condition of the base and pipes, and position of the soil stack | Decides the route of the drains and the scope of the work |
| Drains and plumbing | Pressure test and drains with water | A leak behind the tiling means opening it up |
| Electrics | Circuits, protections and shower zones according to REBT | The chases are closed in the next stage |
| Falls and waterproofing | Fall towards the drain and watertightness test | It is the stage nobody will see once tiled |
| Tiling and flooring | Levels, plumb lines, joints and accessible access panels | Later correction means redoing it piece by piece |
| Sanitaryware and screen | Real measurement, sealing and final tests | Made-to-measure glass cannot be returned |
That is the logic of working with a single site manager who coordinates the trades: each one comes in when the previous one has left the stage checked, and nobody covers up what has not been tested. A fixed quote broken down by item lets you see those stages separately and spot when one is missing.
Frequently asked questions about the order of a bathroom renovation
What is done first when renovating a bathroom?
First the area is protected, the bathroom supplies are cut off and the marking out is done. Then it is demolished and what appears is checked: base, old pipes and soil stack. Until that has been seen, the route of the drains is not settled.
Is tiling done before or after plumbing?
After. The plumbing and drains go inside the wall and floor, they are tested under pressure and with water, and only once they are checked is the area waterproofed and tiled. Doing it the other way round means opening the tiling at the first leak.
When is a bathroom waterproofed?
After the installations and after rebuilding the falls, and before the tiling and flooring are laid. Once the system has cured, a watertightness test is done by filling the area with water, and it is checked that the level does not drop.
When is the shower screen fitted?
At the end, when the tiling, grout and sealing have dried. The measurement is taken on site with the walls finished, because made-to-measure toughened glass cannot be corrected, and ordering it from the plan measurement often goes wrong.
Do you need a prior notification to renovate a bathroom?
If the work is interior and does not touch the structure or the façade, a prior works notification at the town hall is usually enough. Each town hall has its own bylaw, so it is worth confirming with a prior enquiry or with a professional.
Further reading
- Bathroom renovations in Barcelona - How a bathroom renovation is handled from start to finish, with a free technical visit and a fixed quote.
- Bathroom renovation in Barcelona: complete guide to prices, materials and timescales - If you are looking for prices, materials and total timescales, which are not covered here.
- Ideas for a small bathroom: the building decisions that gain space - The layout decisions worth settling before the work starts, especially in small bathrooms.
- Waterproofing in a bathroom renovation: materials, regulations and common mistakes - The waterproofing stage explained in depth: systems, regulations and usual failures.
- Cost of renovating a 5 m² bathroom: the standard quote and the step up to a built-in shower - The standard quote for a 5 m² bathroom item by item, as a next step to put figures on it.
Sources
Keep reading
Small bathroom ideas: the building decisions that gain space
Shower instead of bath, a door that does not sweep the room, wall-hung toilets and continuous tiling: what really gains space in 3-4 m².
BathroomsWhat is a shower screen? Types and how to choose one
Thinking of renewing your bathroom? What a shower screen is, the main types by opening style, glass and frame, and expert tips on choosing one.
BathroomsElectrical protection zones in a bathroom: ITC-BT-27 explained
What the electrical protection zones in a bathroom are under ITC-BT-27 of Spain's low-voltage regulations (REBT). Safety volumes, limits and practical tips.